
In the last post, we learned how to make custom portraits, and here in this article, we expand our modification to in-game items. While the shape dealing procedures are similar, there are extra steps and other aspects need to be taken care of, since items — especially usable items, have a lot of properties that we need to set for them.
This part we mainly focus on editing SHAPES.VGA, as well as have a basic understanding of shape editor in Exult Studio. Some, but not much map editing will be also mentioned. Since the Serpent Isle paperdoll has much more complexity, I will demonstrate it in SI, and it will naturally cover BG modding of items.
Case study 2: tutorial mod of items — Treasures of Wonder
The sample patch “Treasures of Wonder” is published here: https://github.com/yulotomorrow/Treasures-of-Wonder. If you are interested you can also download it and try it yourself, or open it in Exult Studio to observe what I have done in this patch about item modifying. Next I will explain step by step what I did and how you can do the similar things.
(Note that the patch might change in the future, and content might not matching this article after changes.)
Step 1: editing existing item
This is considered easy because we don’t need to fill out the whole form of item for it to work, instead we can adjust step by step to achieve what we want.
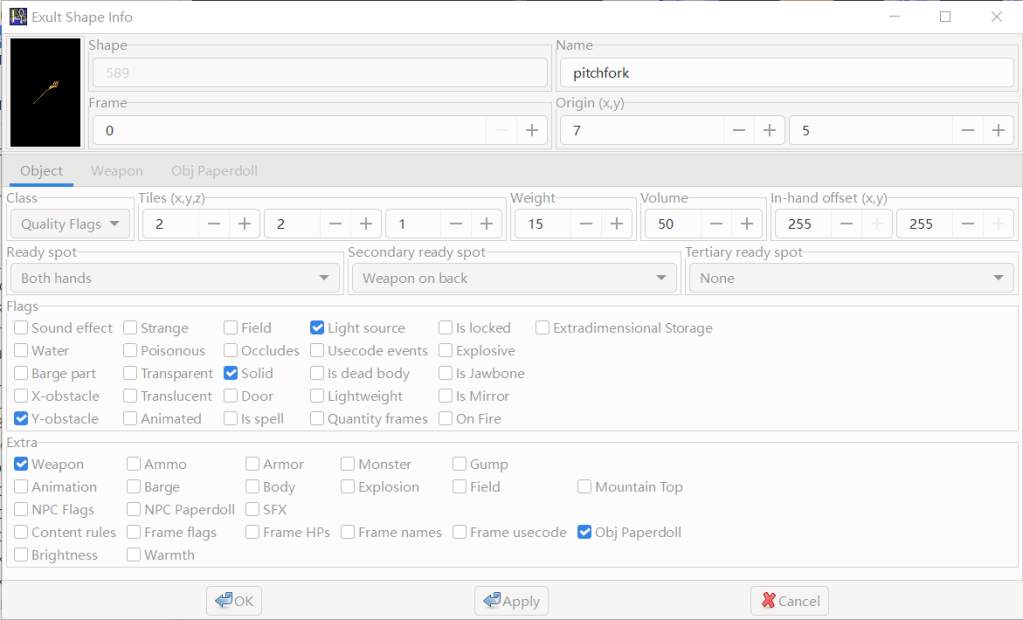
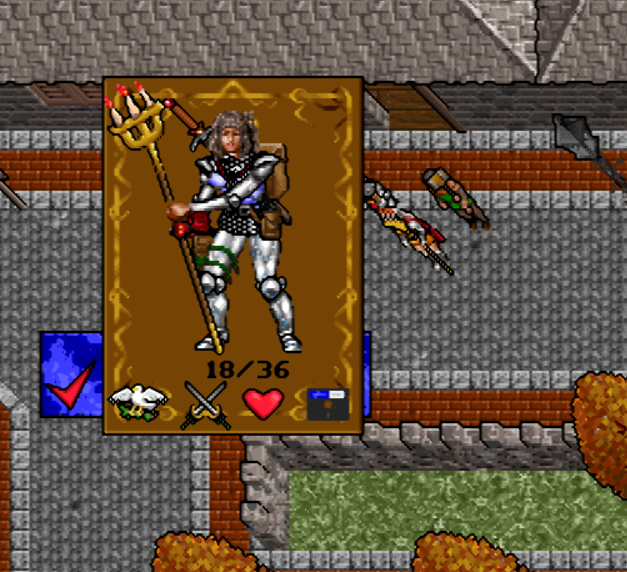
For example, the first item we try to modify is the pitchfork. Fellowship Candelabra is missed by the Avatar since the Fellowship has been destroyed, so Avatar secretly bring one to Serpent Isle. As we learned from last article, we export the shape, paint over each frame (make sure EACH FRAME should be modified if it’s the same item), then import back and save. Now we try to increase the damage by finding the damage of weapon, then we can also choose a flag of light source. Now we have a powerful battle Candelabra instead of the boring pitchforks!
In Serpent Isle, we need to take care of the paperdoll too. We do the same of modifying and changing shp file of corresponding paperdoll. Usually you will be recognizing which paperdoll shape is a pitchfork since paperdoll sprites are much larger. But paperdoll files are not named so it’s impossible to search, if you cannot recognize, you need to go to the shape tag again, find info-Obj Paperdoll tag, then find the corresponding number of paperdoll and edit.
Note that if we modify item like this, every pitchfork in the game will be a candelabra. It’s fortunate that we are modding SI, if it’s in BG, the murder candelabra will have another meaning… In the final patch, I didn’t use direct item modifying to avoid unexpected game environment changes.
Step 2: add a frame of a group of items
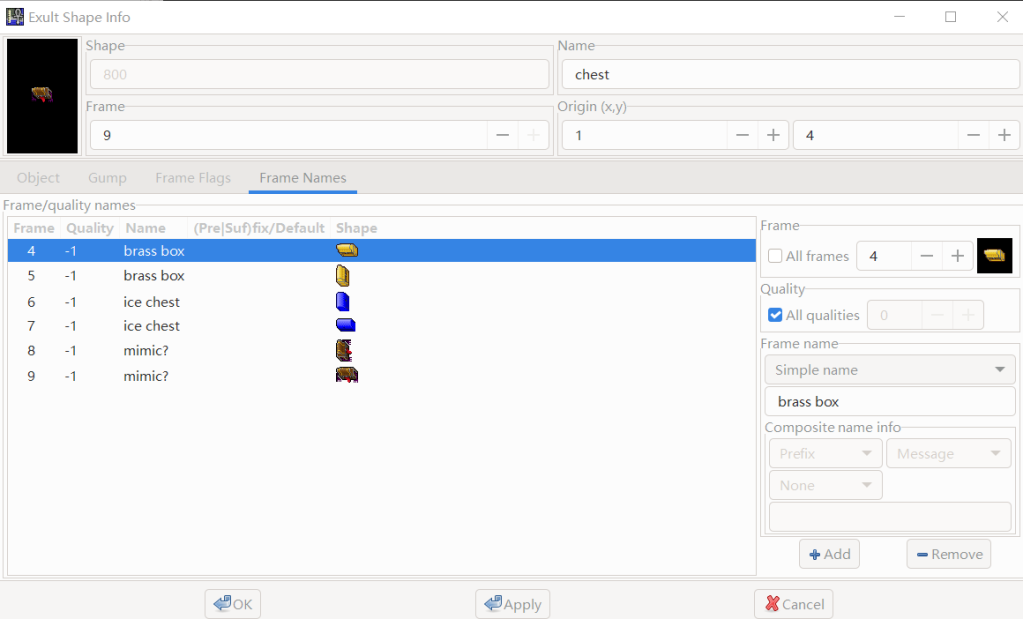
In the base game, the different types of treasure chests are counted as the same item in different frames. There are very good reasons for doing this: On one hand the number of shapes we need to handle will decrease, on the other hand we don’t need to set mostly the same parameters over and over in different items. So if we want to add a different kind of chest, we better put it under the same shape too, by adding extra frames.
Adding single frame directly is possible in Exult Studio, but I still suggest export the group of .shp file first, add new layers and import. By doing this you will be having a reference of how large the items and their positions are, to limit the possible inconsistency in position and size. Here we add 2 layers to the chest shp file, one for facing front and one for facing sideways. The same shape shares the same set of parameters, but it’s still possible to change some of them individually, for example the frame name. Frame name is not only convenient for searching in Exult Studio, when you click an item in game, the name it shows is the frame name.
Step 3: Adding new items
New items are a bit not so straightforward as it requires you to understand the different properties in the editor more, or the item will not work properly in game. Luckily, we have so many existing items for us as references, so we can imitate the settings of similar items to create ours.
Placeable items are usually the easy kind. First you need to create new shape in SHAPES, then import the shape, a usual map object mainly falls into Quality/Quality Flags, breakable and building categories, set the name of shape, dimensions, weight and volume, then it’s almost done. The tiles (dimensions) need to set according to the sprite size, or it will look weird or work unexpected in game. This usually can be spotted in map editing. Also need to note that the Weight is in unit of 0.1 Stones, so an item of 1 Stone should be set as 10.
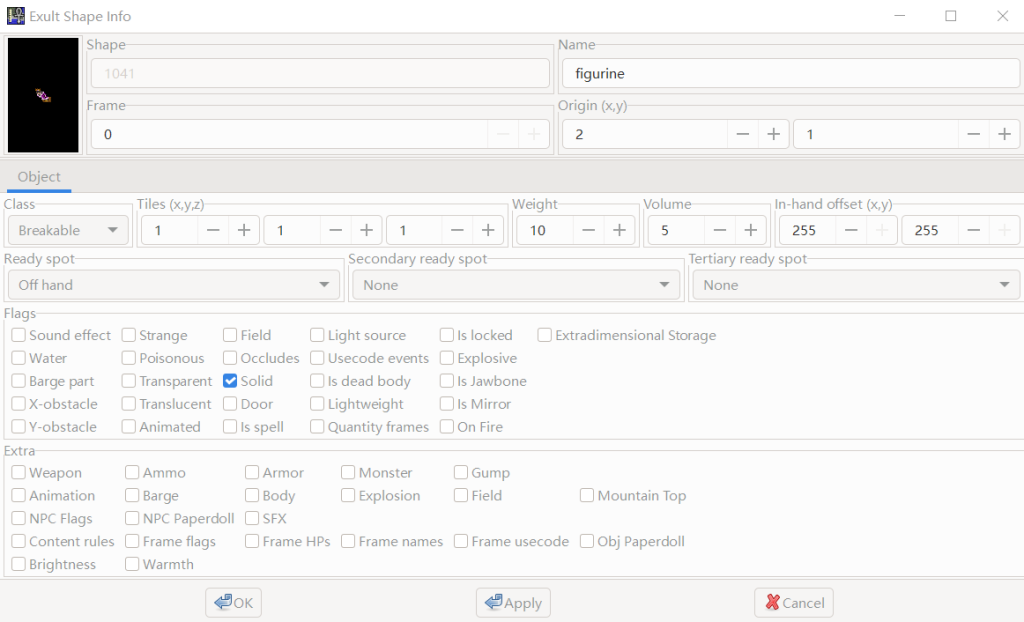
Weapons and armors should be taken care of their other properties. One is related to weapon attack, we tick “Weapon” (or “Armor”) in Extra checkboxes, a new tab will appear next to Object tab. Under weapon, we choose the damage value and type, as well as other details. You can listen to different SFX in game and choose, or alternately, just find a similar weapon and follow how they choose. Then for weapons and armors we need to create paperdoll model too. We create new shape in PAPERDOLL file, and remember the corresponding shape index. We will be using it in another tab in the shape info: Obj Paperdoll.
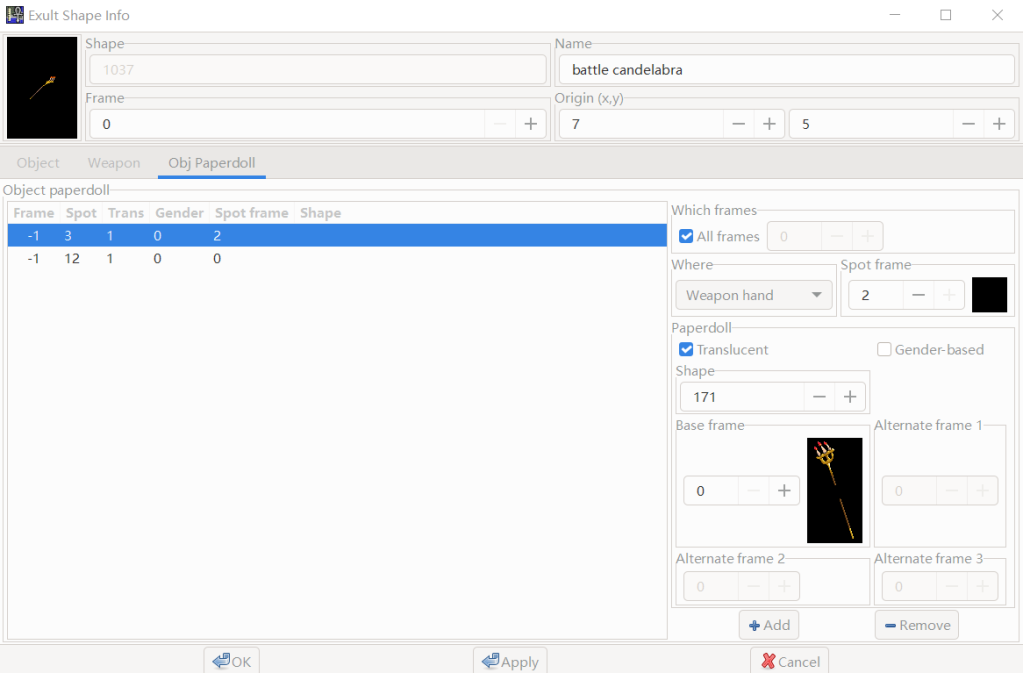
Moving to the Obj Paperdoll tab, we need to choose both weapon slot and paperdoll shape index. Weapon slot might be multiple, like holding in hand and on back, we need to add them separately, and choose the correct paperdoll frame in each slot. Usually for weapons and armors, we need to tick “all frame” and “translucent”. When finish adding all needed slots, apply the changes and save in editor.
There is one tricky thing for holding weapons. By default, the weapon will not show on the Avatar in game model, that’s because when “In hand offset” is set to (255, 255), it means suppress showing on model, so it’s default not showing. In a weapon shape the first frame is by convention the shape how it looks like on map, so frame 0 should keep (255, 255) but other frames should change to some small numbers. You can imitate how other weapons fill out the offset, but eventually you still need to adjust after seeing how it performs on in-game model.
Although the Exult studio suggest you doing all the modification while the game is running, for pure item editing, you can do it without game running. This is to avoid any unexpected changes made in game while testing, and if you save the unexpected changes, there’s no way to revert. If you only do them in editor, then you can save your changes by clicking save all without concern of unexpected map changes, or you would like to choose save -> shape info. But these items are just on the lists for now, they are not in game yet. So next we need to move forward and put them on map, thus some basic map editing.
Step 4: Put them on map!
Map editing is tricky. Everything you do to the game will be saved when you are doing map editing and saved the map, including individual item positions, chunks, inventory info, and so on. So when editing on map, we need to make sure we don’t accidentally change other unrelated things or pick up unrelated items.
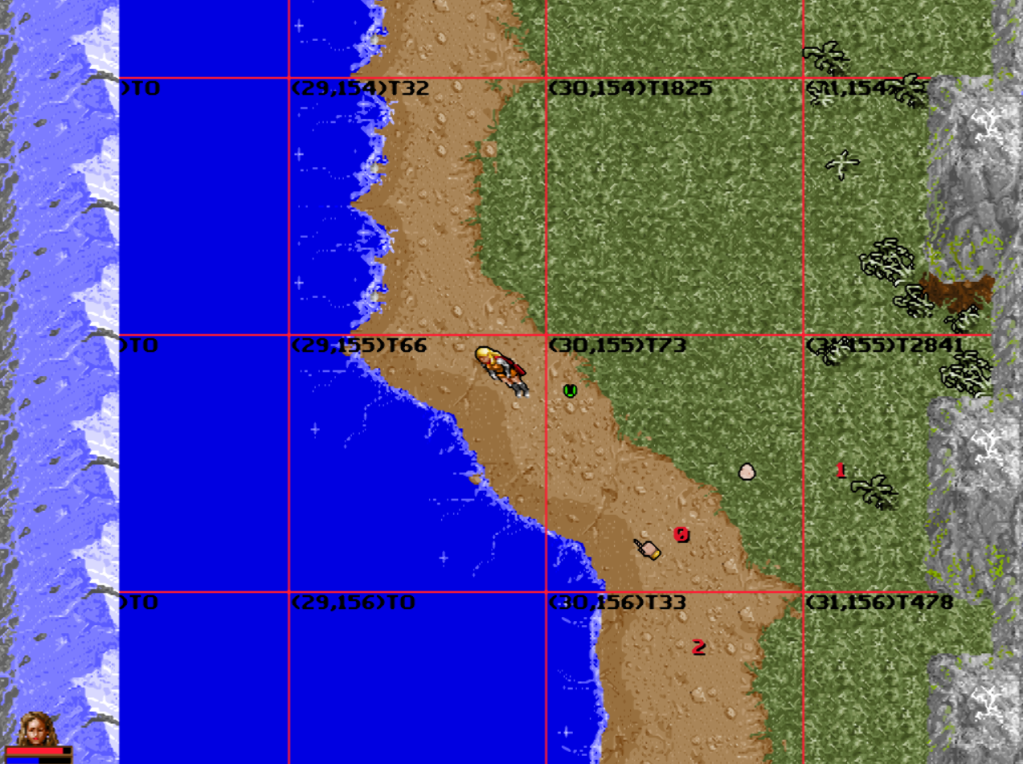
Usually you would turn on the cheat mode and press ctrl-alt-M to edit map, but it’s suggested to use a clean save, aka start from the beginning. Run Exult from command line using –edit command, the game will start from the very beginning with map edit mode. If the Exult Studio editor didn’t appear simultaneously, you need to open one manually. Use F3 teleport cheat to navigate on map, go to where you want to put the items. Then drag items from editor to the map, it will be on the map with tile dimension indicator. If a shape has multiple frames and the default isn’t what we want, just double click it and select another frame. If we want to put items in containers, we need to press the same to exit map edit mode, put them manually, and save map. Before we finish we make sure we didn’t do unexpected changes to the map, then teleport Avatar to the original place where it begins. In Exult Studio, we save the map, and the item patch is done!
Congratulations, now you know how to add or edit items in Exult, and you can do it yourself too! Don’t worry of breaking the game, all the changes will go to \patch folder, so the worst situation you just need to delete the whole patch folder. But since there’s no revert functionality in Exult Studio, doing your own version control is important in making larger mods!
Thanks to Dominus Dragon for his huge help in making the patch and tutorial! Next part of this tutorial series we will be learning basic Usecode scripting in Exult modding. Please stay tuned!

Leave a comment